
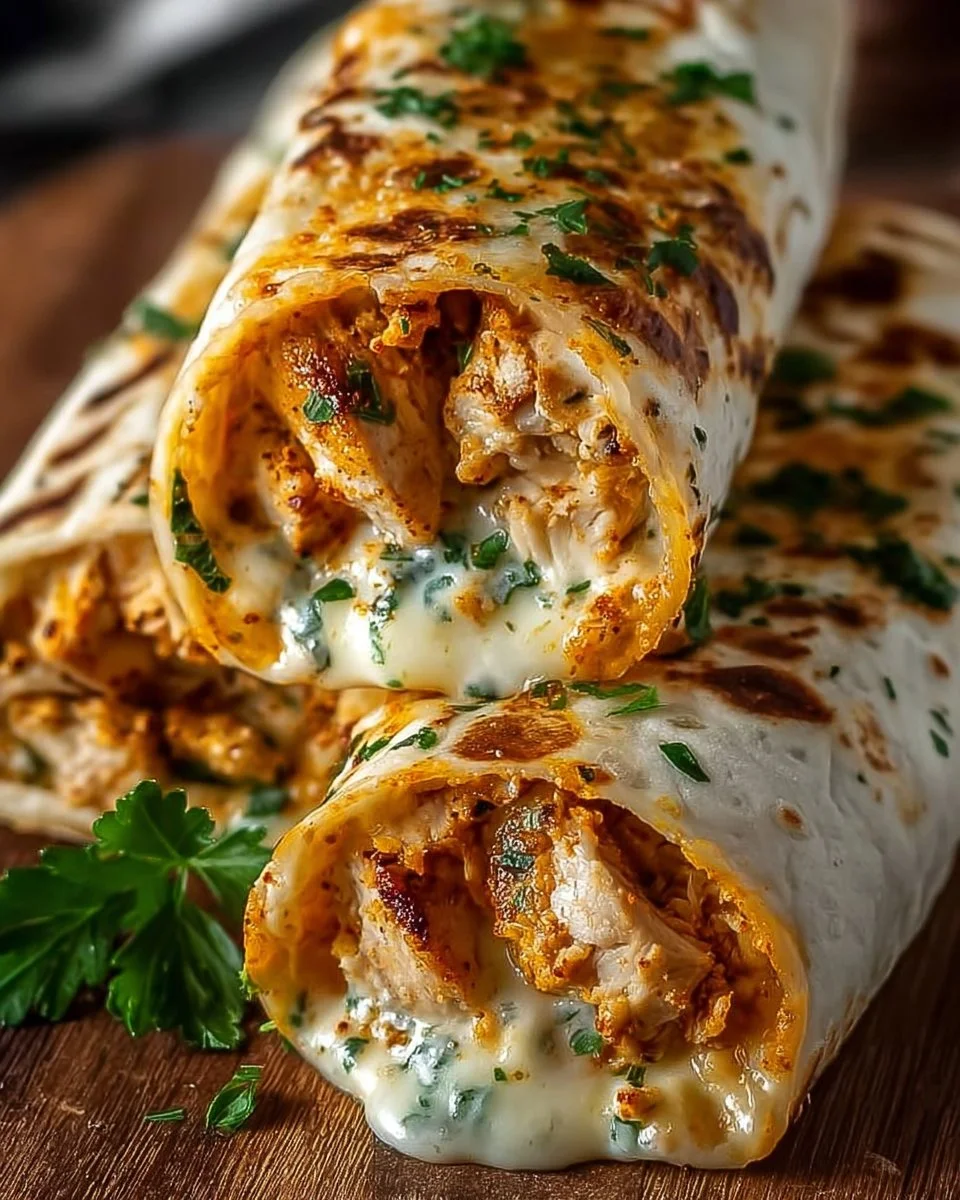
I remember the first time I tossed leftover shredded chicken with a mound of melty cheese and garlicky greens, then folded it into a warm tortilla — the result was simple comfort food that felt next-level. Cheesy Garlic Chicken Wraps are exactly that: a fast, satisfying handheld meal that hits savory, creamy, and garlicky notes in every bite. People make these for busy weeknights, quick lunches, or to please picky eaters without fuss. They’re especially handy when you want something cozy, portable, and protein-packed. If you like cheesy chicken handhelds, you might also enjoy this buffalo chicken dip with cottage cheese as a dip or spread alongside.
Why you’ll love this dish
This wrap is a two-minute crowd-pleaser: warm, cheesy filling wrapped in a soft tortilla. It’s fast to assemble if you have cooked chicken on hand, and it’s flexible — swap cheeses, toss in herbs, or add vegetables to suit your family. It’s budget-friendly because it stretches modest amounts of chicken with cheeses and cream cheese, kid-approved thanks to the familiar flavors, and low-carb options are easy with the right tortillas. Make it for a weeknight dinner, a casual brunch, or pack it for a picnic.
The cooking process explained
Quick overview — what happens and why. First, mix shredded or diced cooked chicken with leafy spinach, garlic, herbs, and three kinds of cheese for creaminess and melt. Heat a skillet, brown a tortilla briefly, add a portion of the filling, and fold to seal. A short cook on each side crisps the tortilla and melts the cheese. Total hands-on time: about 15–20 minutes if the chicken is ready; otherwise account for time to cook the chicken.
What you’ll need
- 2 cups Chicken breast, cooked (shredded or diced)
- 1 handful Baby spinach (roughly chopped)
- 2 cloves Garlic, minced
- 1 tbsp Parsley, fresh, chopped
- Salt and pepper to taste
- 1 tbsp Olive oil
- 1/2 cup Cheddar cheese, shredded
- 1/4 cup Cream cheese, softened
- 1 cup Mozzarella cheese, shredded
- 4 Large low-carb tortillas or wraps
Substitutions and notes: use rotisserie chicken to save time. If you don’t have low-carb wraps, regular flour tortillas work fine. Greek yogurt can replace some cream cheese for a tangier, lighter filling (reduce total yogurt to 3–4 tablespoons).
Step-by-step instructions
- In a medium bowl, add the cooked chicken, chopped baby spinach, minced garlic, chopped parsley, a pinch of salt, and some black pepper.
- Add the cheddar, cream cheese, and mozzarella to the bowl. Stir until the mixture is evenly combined and creamy.
- Warm a skillet over medium heat and add the olive oil to coat the surface.
- Place one tortilla in the skillet and spoon a quarter of the chicken-cheese mixture onto half of the tortilla. Spread it into an even layer.
- Fold the tortilla over the filling so it’s a half-moon. Cook for 2–3 minutes until the bottom is golden and crisp. Flip and cook the other side for another 2–3 minutes, pressing down gently so the cheese melts.
- Remove to a cutting board, let rest a minute, then slice in half and serve warm. Repeat with the remaining tortillas and filling.
Best ways to enjoy it
Serve these wraps warm with a simple side salad dressed in lemon vinaigrette, a cup of tomato soup, or crunchy pickles for contrast. For dipping, tangy salsa, a herby yogurt dip, or plain sour cream work well. If you’re serving a crowd, slice the wraps into smaller pieces and arrange them on a platter with raw veggie sticks. For a heartier meal, add roasted potatoes or a grain salad alongside. If you want inspiration for complementary chicken-heavy sides, check this buffalo chicken dip with cottage cheese recipe for crowd-pleasing options.
Storage and reheating tips
Store cooled wraps in an airtight container in the refrigerator for up to 3 days. To freeze, wrap each wrap tightly in plastic wrap and place in a freezer-safe bag for up to 2 months. Thaw overnight in the fridge before reheating. Reheat gently in a skillet over low-medium heat so the tortilla crisps and the filling warms through without drying. You can also reheat in a toaster oven at 350°F (175°C) for about 8–10 minutes. Avoid microwaving straight from frozen — it tends to make the tortilla soggy, though a short microwave burst followed by a quick pan crisp can work.
Helpful cooking tips
- Use warm or room-temperature filling when possible; cold cream cheese can make rolling harder.
- Shred cheeses finely so they melt uniformly.
- Press the tortilla with a spatula while cooking to help all cheeses merge and the wrap hold together.
- If your spinach is very wet, squeeze excess moisture before mixing to prevent a soggy wrap.
- For even faster assembly, prepare the filling in advance and store it chilled for up to 24 hours.
Creative twists
- Add a smoky edge: Stir in a small pinch of smoked paprika.
- Veg-forward: Swap spinach for baby arugula or thinly sliced roasted peppers.
- Spicy kick: Mix in a spoonful of chopped pickled jalapeños or a dash of hot sauce.
- Lighter version: Replace half the cream cheese with plain Greek yogurt.
- Make it Mediterranean: Add chopped sun-dried tomatoes and a sprinkle of oregano.
Common questions
Q: How long does it take to make these wraps from start to finish?
A: If your chicken is pre-cooked, about 15–20 minutes total: 5–10 minutes to mix the filling and 2–3 minutes per wrap to crisp and melt. If you need to cook chicken first, add roughly 15–20 minutes depending on the method.
Q: Can I use shredded rotisserie chicken?
A: Yes — rotisserie chicken is an excellent shortcut. Just shred and mix with the cheeses and herbs as directed.
Q: Are these safe to freeze and reheat?
A: Yes. Freeze fully cooled wraps tightly wrapped for up to 2 months. Thaw overnight in the fridge and reheat in a skillet or toaster oven for best texture.
Q: Can I make these dairy-free or vegan?
A: Replace cream cheese and shredded cheeses with dairy-free alternatives and choose a plant-based chicken substitute. Be mindful that melt and flavor will vary depending on the plant cheeses used.
Q: What’s the best way to prevent a soggy wrap?
A: Remove excess moisture from spinach, avoid overfilling, and cook the wrap on medium heat so the exterior crisps while the interior warms.
Conclusion
If you want another take on cheesy handhelds, this Cheesy Chicken Wraps | Spicedblog offers a similar flavor profile and extra ideas for fillings and techniques. Enjoy experimenting — these wraps are one of those recipes that reward small tweaks.
Print
Cheesy Garlic Chicken Wraps
- Total Time: 25 minutes
- Yield: 4 servings
- Diet: Gluten-Free, Low-Carb
Description
A quick and satisfying handheld meal featuring shredded chicken, melty cheese, and garlicky greens wrapped in a soft tortilla.
Ingredients
- 2 cups cooked Chicken breast, shredded or diced
- 1 handful Baby spinach, roughly chopped
- 2 cloves Garlic, minced
- 1 tbsp fresh Parsley, chopped
- Salt and pepper to taste
- 1 tbsp Olive oil
- 1/2 cup Cheddar cheese, shredded
- 1/4 cup Cream cheese, softened
- 1 cup Mozzarella cheese, shredded
- 4 large low-carb tortillas or wraps
Instructions
- In a medium bowl, add the cooked chicken, chopped baby spinach, minced garlic, chopped parsley, a pinch of salt, and some black pepper.
- Add the cheddar, cream cheese, and mozzarella to the bowl. Stir until the mixture is evenly combined and creamy.
- Warm a skillet over medium heat and add the olive oil to coat the surface.
- Place one tortilla in the skillet and spoon a quarter of the chicken-cheese mixture onto half of the tortilla. Spread it into an even layer.
- Fold the tortilla over the filling so it’s a half-moon. Cook for 2–3 minutes until the bottom is golden and crisp. Flip and cook the other side for another 2–3 minutes, pressing down gently so the cheese melts.
- Remove to a cutting board, let rest a minute, then slice in half and serve warm. Repeat with the remaining tortillas and filling.
Notes
Use rotisserie chicken to save time. Cold cream cheese can make rolling harder; use warm filling. Store cooled wraps in an airtight container for up to 3 days, or freeze for up to 2 months.
- Prep Time: 10 minutes
- Cook Time: 15 minutes
- Category: Main Course
- Method: Skillet Cooking
- Cuisine: American