
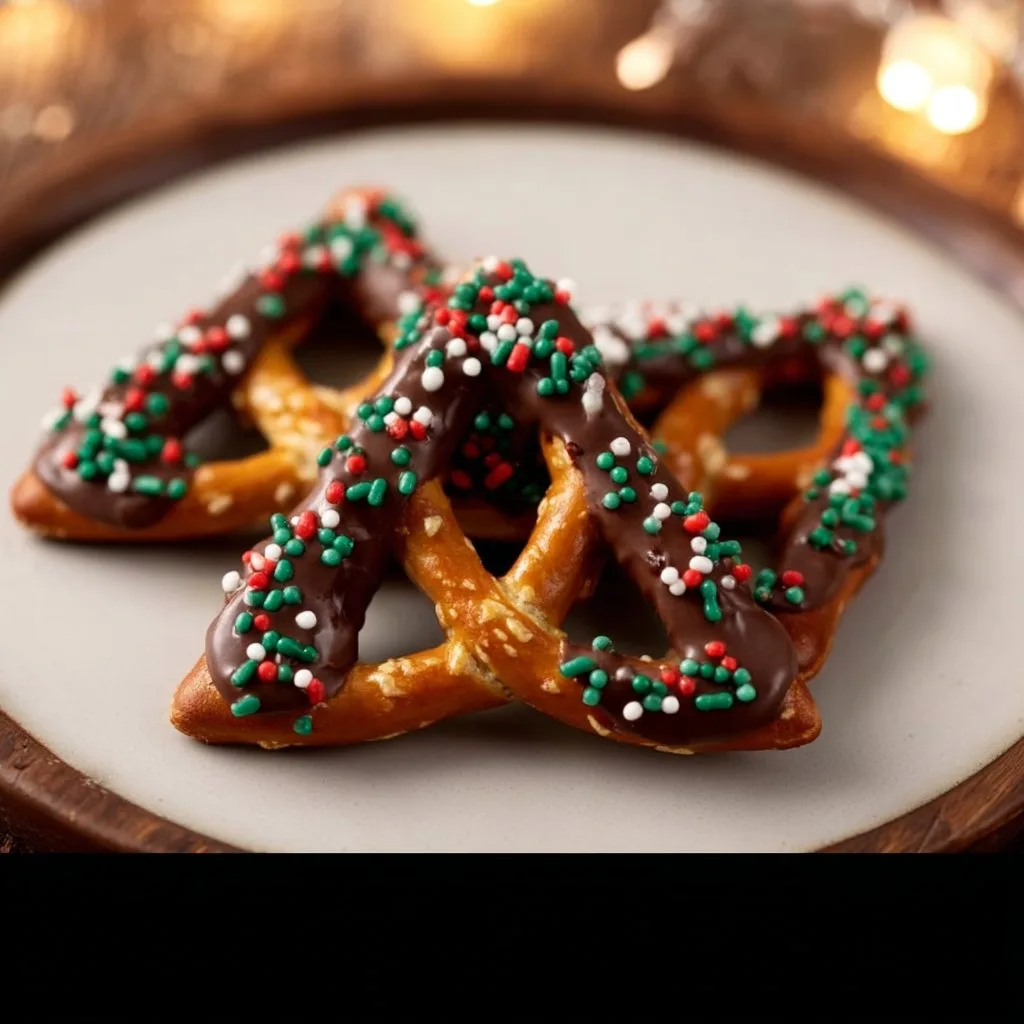
Making delicious treats during the holiday season is a tradition in many homes. Chocolate Covered Christmas Pretzels blend the salty crunch of pretzels with the sweet richness of chocolate, creating a delightful snack that’s hard to resist. I still cherish the memories of making these festive goodies with my family each year. They’re not just a treat; they’re a symbol of holiday cheer, often presented as gifts or enjoyed during festive gatherings. With their vibrant colors and decorative sprinkles, these pretzels bring joy to any dessert table.
Why You’ll Love This Dish
One of the best things about Chocolate Covered Christmas Pretzels is how quick and easy they are to make. You just need a few ingredients, and they come together in no time! They’re perfect for busy holiday schedules, allowing you to whip up a tasty treat without spending hours in the kitchen.
Imagine everyone munching on these sweet-and-salty delights at your holiday party. They’re a fantastic addition to dessert platters, and guests love to pick them up as a fun, finger-friendly snack. Plus, they’re budget-friendly, making them a great option for festive gatherings without breaking the bank.
“These Christmas pretzels are the highlight of our holiday gatherings! Everyone looks forward to them each year.”
How This Recipe Comes Together
The process of making Chocolate Covered Christmas Pretzels is as joyful as tasting them! In just a few simple steps, you’ll go from basic pretzels to beautifully coated treats ready to impress your friends and family. You’ll find that the preparation is straightforward and beginner-friendly, making it a delightful project to undertake, especially with kids eager to help.
What You’ll Need
- Pretzels
- Candy melts (green, red, and white)
- Sprinkles
- Mini chocolate chips
- Vegetable oil (optional, for a smoother melt)
Step-by-Step Instructions
- Begin by melting the candy melts according to the package instructions. Make sure they’re nice and smooth for easy dipping.
- Dip each pretzel into the melted candy, ensuring it’s well-coated.
- Place the coated pretzels on a baking sheet lined with wax paper, allowing for easy removal later.
- While the chocolate is still wet, sprinkle with festive decorations like colored sprinkles and mini chocolate chips.
- Allow the pretzels to set until the candy hardens completely.
- Once set, enjoy your delightful Christmas pretzels with friends and family!
Best Ways to Enjoy It
While these Chocolate Covered Christmas Pretzels are amazing on their own, there are numerous ways to present and enjoy them. For a stunning display, arrange them on a festive platter, interspersing them with other holiday treats. They pair wonderfully with hot chocolate or a holiday punch, adding a touch of joy to each sip. You can even package them in decorative bags for a homemade gift—a thoughtful gesture that friends and coworkers will appreciate.
Keeping Leftovers Fresh
To maintain their deliciousness, store any leftover Chocolate Covered Christmas Pretzels in an airtight container at room temperature. They should stay tasty for about a week. If you want to keep them longer, you can freeze them. Just make sure they’re in an airtight container layered between parchment paper to prevent them from sticking together. When ready to enjoy, let them thaw at room temperature.
Helpful Cooking Tips
To ensure your pretzels turn out perfect, consider these tips:
- Use high-quality candy melts for the best chocolate coating flavor and texture.
- Experiment with toppings! In addition to sprinkles and mini chocolate chips, consider crushed peppermint or nuts for an extra crunch and flavor contrast.
- Keep the kitchen cool while the candy is setting to avoid any melting or softening.
Creative Twists
If you’re feeling adventurous, try changing things up with different flavored candy melts or adding a hint of peppermint extract to the melted chocolate for a refreshing twist. You can also create themed pretzels for different holidays by using appropriate colors and decorations. From pastel colors for Easter to vibrant designs for birthdays, the possibilities are endless!
Your Questions Answered
- How long does it take to prepare? The preparation takes about 30 minutes, and once they’re set, you can enjoy them right away!
- Can I substitute the candy melts? Yes! Chocolate chips can work as a substitute but may need added vegetable oil to help them melt smoothly.
- How should I store leftovers? Keep them in an airtight container at room temperature, or freeze for longer storage.
- Are these safe for individuals with nut allergies? Yes, if you use nut-free sprinkles and ensure all ingredients are free from cross-contamination. Always check labels for allergy warnings.
Get ready to bring some sweet cheer into your holiday season with these incredible Chocolate Covered Christmas Pretzels. They’ll be a hit at any gathering and will undoubtedly become a cherished part of your celebration!
Print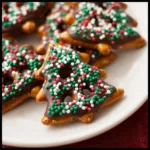
Chocolate Covered Christmas Pretzels
- Total Time: 40 minutes
- Yield: 20 pretzels
- Diet: Vegetarian
Description
A delightful snack blending salty pretzels with sweet chocolate, perfect for holiday gatherings.
Ingredients
- Pretzels
- Candy melts (green, red, and white)
- Sprinkles
- Mini chocolate chips
- Vegetable oil (optional, for a smoother melt)
Instructions
- Begin by melting the candy melts according to the package instructions until smooth.
- Dip each pretzel into the melted candy, ensuring it’s well-coated.
- Place the coated pretzels on a baking sheet lined with wax paper.
- While the chocolate is still wet, sprinkle with festive decorations like sprinkles and mini chocolate chips.
- Allow the pretzels to set until the candy hardens completely.
Notes
Store leftovers in an airtight container at room temperature for up to a week, or freeze for longer storage.
- Prep Time: 30 minutes
- Cook Time: 10 minutes
- Category: Dessert
- Method: No-Bake
- Cuisine: American