
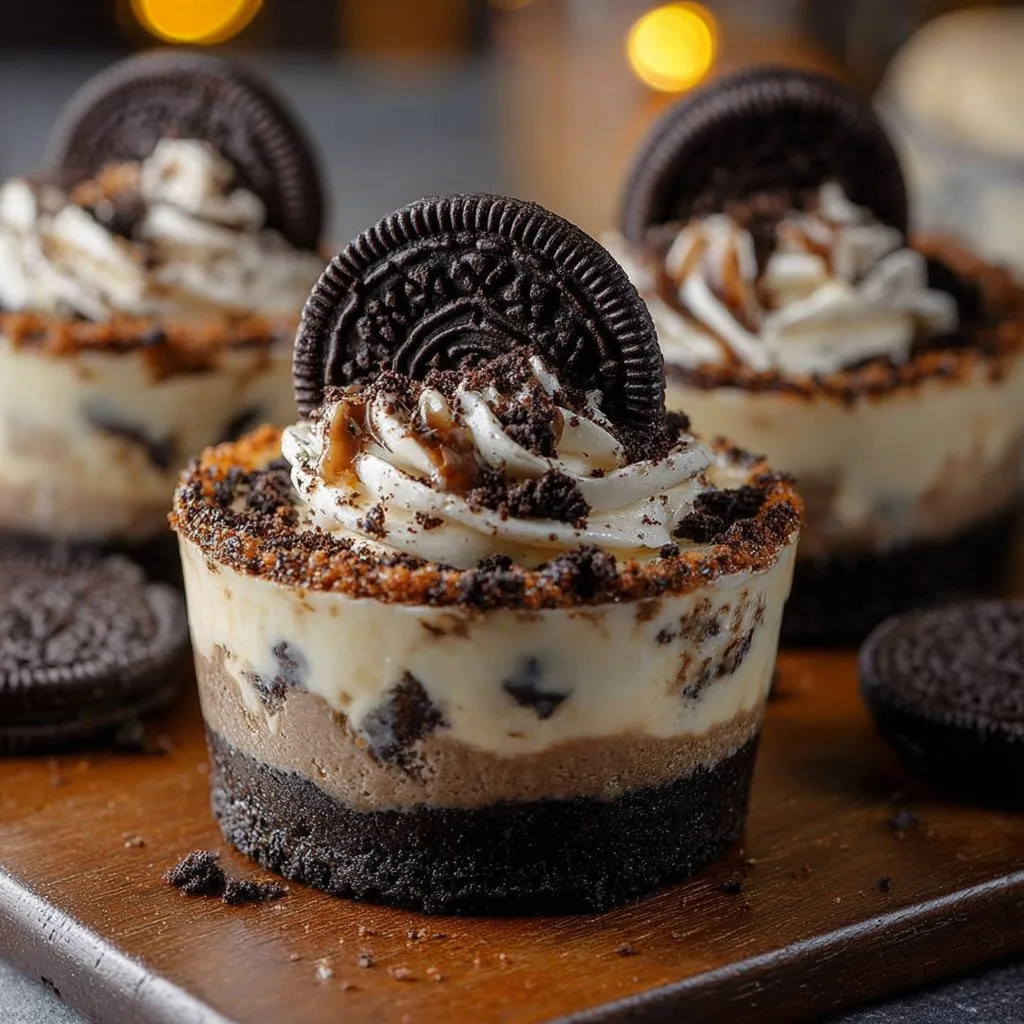
Oreo Cheesecake Cups are the ultimate dessert that perfectly balances creamy, rich cheesecake with the beloved crunch of Oreo cookies. This delightful treat is not just a feast for the taste buds but also a feast for the eyes, making it a great choice for any gathering or celebration. I remember the first time I made these cups—friends gathered around, eyes lighting up as I put the beautifully layered treats on display. This dessert is especially beloved at parties, family gatherings, and even as a special weeknight treat, with its no-bake option making it user-friendly for all skill levels in the kitchen.
Reasons to try it
These cups are a stunning combination of flavors and textures, and there are plenty of reasons to whip them up. First off, they are incredibly easy to make and require just a handful of ingredients, making them a budget-friendly option that is also kid-approved. Whether you’re preparing for a cozy family dinner or a festive celebration, they’re the perfect make-ahead dessert. Plus, there’s something so charming about serving individual portions in cups—they’re easy to grab, and you can dress them up with various toppings to suit any occasion.
"These Oreo Cheesecake Cups were an instant hit at my get-together! Rich, creamy, and so easy to make. I’ll definitely be making them again!" — Sarah L.
The cooking process explained
The best part about making Oreo Cheesecake Cups is that it’s incredibly straightforward. You’ll start by creating a dreamy Oreo crust, then mix together a luscious cream cheese filling, and finally, layer everything beautifully in your serving cups. Trust me; your guests will be mesmerized by how this dessert comes together with just a few steps.
What you’ll need
Gather these items to make your Oreo Cheesecake Cups:
- 1 package Oreo cookies (for the crust)
- 2 cups cream cheese, softened
- 1 cup powdered sugar
- 1 teaspoon vanilla extract
- 1 cup whipped cream
- Extra Oreo cookies for topping
Feel free to use low-fat cream cheese or sugar alternatives if you’re looking for lighter options while keeping the flavors intact!
Step-by-step instructions
Crush the Oreo cookies in a zip-top bag or a food processor until fine crumbs form. This will serve as your delicious base. Divide the crushed cookies evenly into each serving cup for a solid foundation.
In a mixing bowl, blend the softened cream cheese, powdered sugar, and vanilla extract until the mixture is creamy and free of lumps. This creamy texture is the heart of your cheesecake filling.
Gently fold in the whipped cream. This step is key for achieving a light and fluffy texture—take your time to blend the two together without deflating the whipped cream.
Spoon the creamy mixture generously over the Oreo cookie base in each cup. Don’t be shy here; the more filling, the better!
Sprinkle additional crushed Oreo cookies on top of each cup for a decorative finish. This adds not only taste but also an appealing look.
Refrigerate the cups for at least 2 hours. This waiting period allows the flavors to meld and the cups to set perfectly before serving chilled.
Best ways to enjoy it
These Oreo Cheesecake Cups are delightful on their own, but you can elevate the experience even further. Serve them alongside a fresh fruit salad for a bright contrast, or pair them with a hot cup of coffee or herbal tea to balance the sweetness. For a fun twist, consider adding a drizzle of chocolate or caramel sauce on top before serving for an extra layer of flavor. They also look stunning when garnished with mini Oreo cookies or whipped cream peaks.
Keeping leftovers fresh
To store your remaining Oreo Cheesecake Cups, simply cover them with plastic wrap or transfer them to an airtight container. They’ll keep well in the refrigerator for up to 3 days. Make sure to keep them chilled, especially since the filling has cream cheese. If you’d like to make them ahead of time, you can also freeze the cups for up to a month, just remember to thaw them in the fridge before serving.
Helpful cooking tips
For the best results, ensure your cream cheese is softened to room temperature to avoid lumps in your filling. Take care when folding in the whipped cream; this gentle technique keeps air in the mix, creating that coveted fluffy texture. If you want to save time, consider using store-bought whipped cream instead of making your own.
Creative twists
Feeling adventurous? Try swapping out the vanilla extract for almond extract for a nutty flavor profile. You could also blend in different cookie flavors to the crust, like Chocolate Chip or Peanut Butter, based on your preference. For a festive touch, layer in some fruit preserves or chocolate ganache between the layers.
Common questions
How long does it take to prepare these cups?
Preparation time is about 20-30 minutes, plus chilling time of at least 2 hours.
Can I substitute ingredients?
Absolutely! Feel free to use low-fat cream cheese or a gluten-free cookie option.
How should I store leftovers?
Keep them covered in the refrigerator for up to 3 days, or freeze for up to a month.
Can I make these cups ahead of time?
Yes! They’re perfect for make-ahead desserts; just be sure to refrigerate them until serving.
With their rich flavor and satisfying textures, these Oreo Cheesecake Cups are sure to become a favorite in your dessert repertoire. Happy cooking!
Print
Oreo Cheesecake Cups
- Total Time: 150 minutes
- Yield: 6 servings
- Diet: Vegetarian
Description
Oreo Cheesecake Cups are the ultimate dessert that perfectly balances creamy, rich cheesecake with the beloved crunch of Oreo cookies. A budget-friendly and kid-approved treat perfect for any gathering.
Ingredients
- 1 package Oreo cookies (for the crust)
- 2 cups cream cheese, softened
- 1 cup powdered sugar
- 1 teaspoon vanilla extract
- 1 cup whipped cream
- Extra Oreo cookies for topping
Instructions
- Crush the Oreo cookies in a zip-top bag or a food processor until fine crumbs form. Divide the crushed cookies evenly into each serving cup.
- In a mixing bowl, blend the softened cream cheese, powdered sugar, and vanilla extract until creamy and free of lumps.
- Gently fold in the whipped cream to achieve a light and fluffy texture.
- Spoon the creamy mixture generously over the Oreo cookie base in each cup.
- Sprinkle additional crushed Oreo cookies on top for a decorative finish.
- Refrigerate the cups for at least 120 minutes to allow flavors to meld and set.
Notes
For best results, ensure cream cheese is softened to room temperature. Consider using store-bought whipped cream for convenience. Leftovers can be stored in an airtight container for up to 3 days.
- Prep Time: 30 minutes
- Cook Time: 0 minutes
- Category: Dessert
- Method: No-Bake
- Cuisine: American